Big Chicken: P-51B Part 6
I’m not brush painting the invasion stripes. In fact, I’m omitting them entirely. Some might call this “chickening out” but I prefer to call it finishing the aircraft in the scheme it wore during the majority of its time in service.
Yeah, that’s it.
I’m basing my decision on various factoids delivered by this article at Combatsim.com. Hofer flew “Salem Representative” for about four months prior to D-Day. Hofer flew the aircraft on D-Day (with stripes, of course) and had to land inside the combat zone and was lucky to get back. Unfortunately, this aircraft was destroyed (while flown by another pilot) about four weeks later.
Combat airplanes in 1944, particularly those flown by “aces”–tended to be repainted often and had short lives. Hofer’s “Salem Representative” spent most of it’s time without the stripes. On the other hand, it does look spiffy with the stripes, and so you see a lot of models with them, and anyway, does the amount of time a vehicle spent in a particular paint job really mean anything, from a model building point of view?
I’ll leave answering that question as an exercise for the student.
I used the same basic techniques here as on the P-47N.
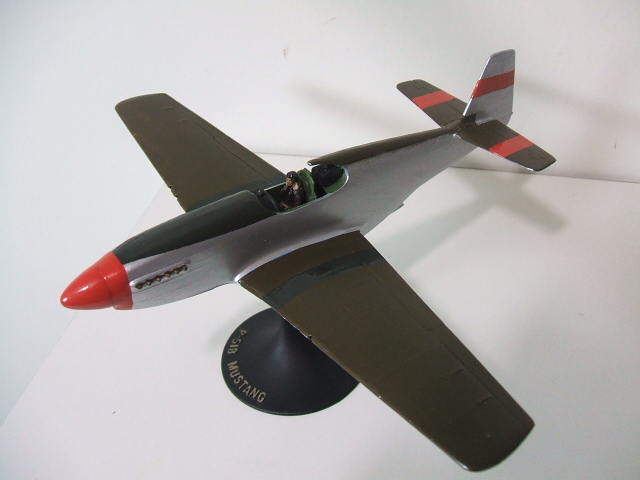
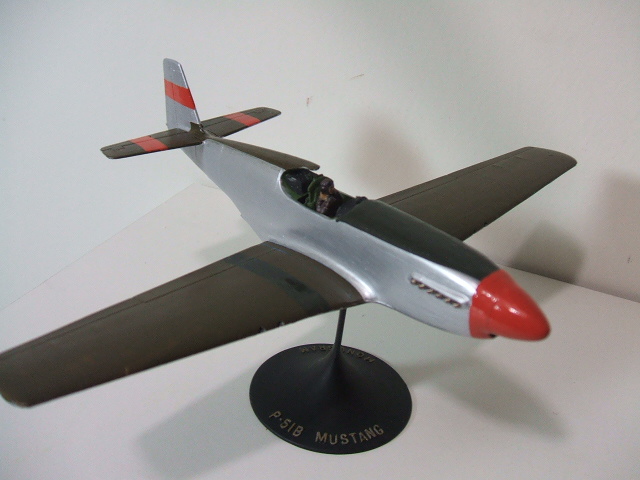
Strips of painted decal material account for most of the “super clean” lines. On the other hand, the bright red is all done without artificial aids. No masking, no decals. The colors were just what I had laying around from previous projects. You’ll notice that I painted the olive drab on the wings and spine a different shade than the anti-glare panel, and I painted the tail stripes in red. This was based on black and white photos so it could be total B.S.
I also chose to paint the stripes on the upper surface of the wings using the “anti-glare” O.D. on top of the other color. It looks like the photos, assuming that the original “black” lines were overpainted as well, and “showed through” the paint.
After reading about how QP*L was lost in combat a few weeks after D-Day, I made a snap decision to skip the invasion stripes. But later on, I had second thoughts. The problem is, if I were to try to paint on invasion stripes now, after putting a coat of Tamiya paint on the wings and “spine”– I’d break the finish chain. The finish chain idea is based on using fully compatible materials to allow the brush painter to avoid any incompatible substances that would spoil the finish.
With an airbrush, this is just not a big deal. You can always spray over it, and only in few cases will incompatible materials cause problems. But when painting with a brush, you can’t be so relaxed. If I painted over the Tamiya paint with white and black to make the stripes, I risk lifting the earlier colors and causing a SNAFU. That’s why I mentioned that I’d have to paint the stripes first. When I decided to go ahead and paint the spine and wings with O.D. that slammed the door on the invasion stripes. The rule is, do not break the finish chain.
I broke the finish chain when painting the Hobby Boss Hellcat when I put paint on top of Future, and then used a brush for Future that had been used earlier for Metal Color. Both of these offenses against the finish chain were well and duly rewarded by the gods of modeling.
The model needs another coat of O.D. on the wings and black stripes on the undersides on the wings and tail. I also need to make and insert doors on the tail wheel well.
So much to do!
Invasion Stripes are for Skunks.
I think they are butt ugly and detract from the looks of an airplane.