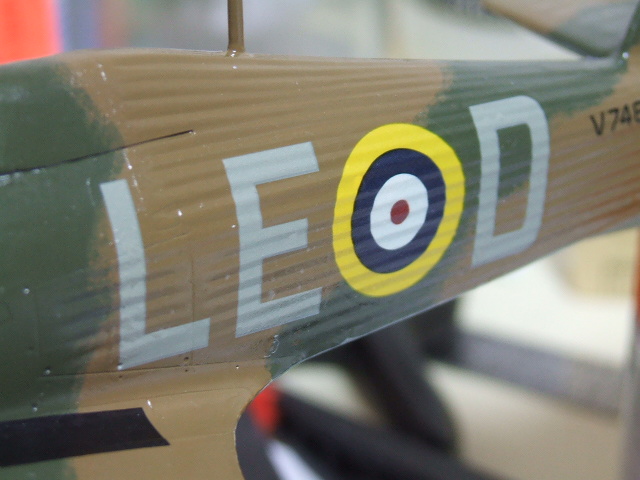
Decal Application
I read Modeling Madness because it putts along at my speed. No bizarre stuff here, just good old country music and gluing some models together, y’all.
But there was a mention of some kind of “new decals” from some outfit named “Eduard” and then I remembered. Slowly I turned.
It seems that you can peel off the clear carrier film on these decals as described by this Frenchman:
Well that’s great. Progress. All that.
But I have a way of doing decals that I learned from Zeus on Mt. Olympus, and this is how it goes. Keep in mind that I’m referring here to old-time Super Scale, Microscale, and Aero Master decals that were tough enough to take it.
Let it soak until it lets go.
Then you put the decal onto a high gloss surface. You need to gloss it up pretty good to get a good result. You also need a nice puddle of water on there to allow the decal to be positioned once it’s off the paper and on the model. So use a brush to add a drop of water to the surface.
Slide the decal off the paper and onto the model using the brush.
The best tool for moving a decal around is metal jeweler’s file. A hobby file. You move the decal with the tip of the file and you can “fine tune” the location. At this point, I DO NOT press the decal down unless there is a big honkin’ air bubble and then I use the “roll a Q-Tip over it” method the remove the bubble. But this is NOT where you get the decal to lay down and hug the underlying detail. That will happen, but it’s a magical process that involves science and shit. Now…
LET IT DRY. (You can use a tissue to “wick” away a big drop of water but otherwise this is a passive process.)
That’s right. No decal “setting solution” is involved in this so far. The decal solution is still sitting right where it usually does. It has not been opened. No solution of any kind has been used at this point. I know that some people do this differently. Bless their little hearts…
Once your decal has dried OVERNIGHT you can get out the Micro Sol and start in. I like Micro Sol. It works great. You just paint over each one of the dried decals with it, like you were adding some kind of final finish coat to each decal. Don’t slop it around because some paints react to the stuff and you don’t need to be so sloppy anyway. Put it on the decals, only. No need to put more than a “coat” on there. You can see it if you look carefully. I know we’re all getting old but just dial up those bifocals and look in there. A nice wet coat of Micro Sol looks like a gloss coat on the decal.
Let the decal dry, again. Overnight, maybe. A few hours at least. THIS TAKES TIME. FOR CHRISSAKE don’t press down on the decal. Don’t touch it.
It’s important to understand that, as a general rule, YOU NEVER PRESS THE DECAL. You do NOT press it in a boat. You do NOT press it with a goat. You will NOT, should NOT (learn by rote). You will NOT press the decal down. You will NOT press them in your town.
No.
The Micro Sol will magically PULL DOWN the decal onto the surface of the model. The effect will restore your faith in God, America, and the Innate Goodness of the Common Man.
This is how I was taught to do this, and all the videos on Youtube, roiling and boiling in hopeless misery and ignorance of the proper technique, cannot change it.
Apply decal.
Let it dry.
Apply Micro Sol.
Let it suck down.
Lie to friends about how you did it so they can’t copy you and will envy you with a crazy kind of hate.
NOTE:
I can’t be responsible for what has happened to decals since the Brits started slurring the word and the Former Soviet Bloc began attempting to make decals. The “thin decal” that is TOO THIN is a real thing and I can’t help you on that one. Mostly, I try to avoid Propagateam, which is a disturbing name anyway. I like their cream puffs, though.
Thanks for this insight. I will use this method on my next decaling challenge.
A lost notion returneth.
Possibly in addition to warm water one could warm up model for initial placement. I have a cardboard box with a clamp- on light to dry paint.