Tamiya Representative: P-51B Part 7
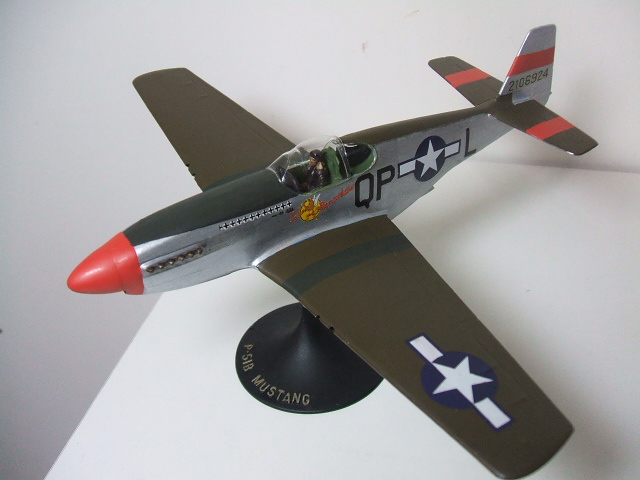
No, it’s not a Tamiya kit. But I used a lot of Tamiya paint on it. The basic technique here is to paint the model with Vallejo Metal Color, then paint the other colors on top of that. I have three custom mixes here, and God Forgive Me I don’t have anything even remotely like “formulae” for these colors. (Actually, the olive drab color was mixed to touch up oak furniture trim…so it’s not matched to any federal standard or anything…)
The gloss colors were flattened using a mix of Future and Tamiya Flat Base (2 parts Future to 1 part Flat Base by volume). This was not brushed over the entire model. Only the areas where gloss paints had been used were covered with the clear flat.
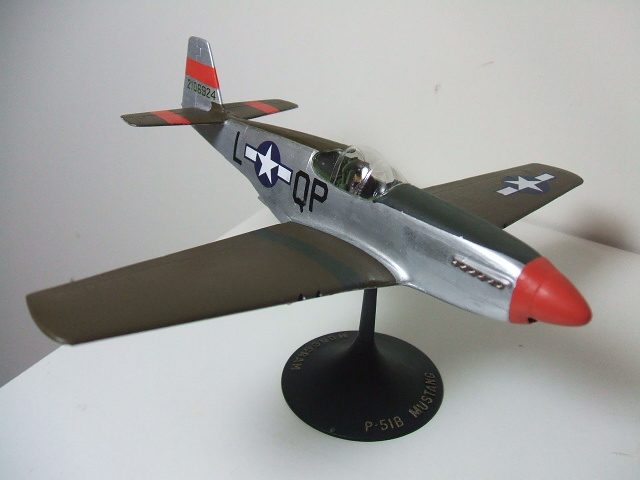
The old Authenticals decals were absolutely amazing. Words fail me. They’re fifty years old and worked so well it boggles the mind. Truly, the best decals I’ve ever seen in this regard.
The “QP L” lettering needed to be replaced. While Authenticals were excellent from a technical point of view, they got the size of the lettering wrong. I replaced them with some dry transfers I had laying around using the methods described here. I also had to use a black felt-tip pen to extend the “tail” on the Q.
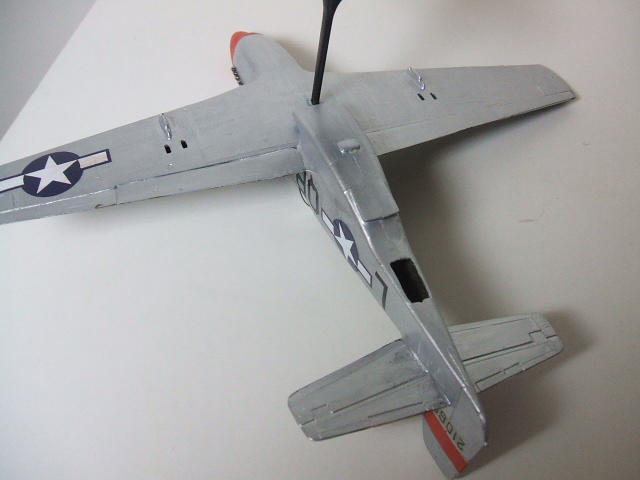
I tried the “ground charcoal” method for darkening the panels around the exhausts. It didn’t really work properly. More study is required.
There is still a lot of work to do on this. The black bands have to be added to the underside, and what about those tail wheel well doors??
The vac canopy was very tricky to trim and install. All I can say is that I’m glad that’s over!
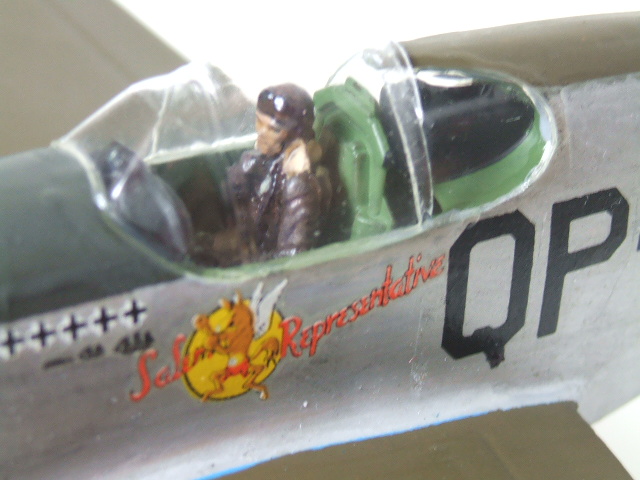
I’ll use the Vallejo Metal Color to paint the canopy frame. I’ve seen several references on the web that imply that the “Malcolm” hood had a frame painted zinc chromate yellow or some other color–not metal. I’m inclined to just paint it metal. Call it autistic license.