Assembly: A-20 Part 2
Actually gluing the parts together doesn’t get much respect on most “serious” plastic kit blogs. The gluing and stuff is just a given–it’s the shading and the misting and the photo-etching that has center stage.
So I thought I’d devote a little space to the neglected art of lining up parts and attaching them together with glue. Most kit builders avoid this subject by declaring any kit produced more than twenty years ago to be “rubbish” and focusing on the latest and greatest. You can’t get into too much trouble putting a Tamiya kit together. It’s just not going to be a problem. But some kit makers were in business before 1997 and they did a reasonably good job on some things. Of course, some of they stuff they made really was rubbish (Revell 1/72 Mustang) and some kit makers just struggled with some things (Airfix clear parts) and you need to be aware of this you’re not going to have a good time. On the other hand, old Revell kits were not exactly bad–considering what they were, and for what they were they were pretty good. But to get the most out of them you have to use certain methods.
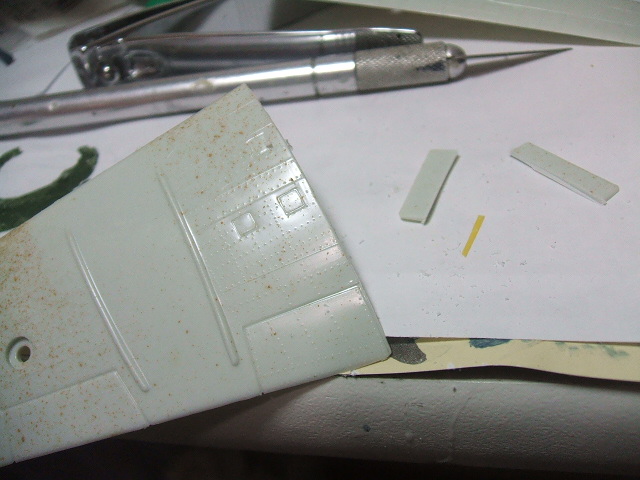
For example, a little method I like to call “Wing Tops First.” This is not something I invented, exactly, but I came up with it independently (if that means anything). My point is that if you don’t want to wrestle with wing-root gaps, attach the tops of the wings SEPARATELY to the fuselage, then the wing bottoms. On a kit like the A-20, you’ll need to cut off the “tabs” on the “bottoms” that go into the fuselage. (Leave the tabs on the wing tops, of course.)
This isn’t what is looks like after filling and sanding. This is after gluing. Most old time kit makers got this right–the wing to fuselage seam. But they got the instructions wrong in that they told you to assemble the wings and THEN attach the whole thing to the fuselage. That’s wrong. Notice in the above photo that the wing tops are in place, but the bottoms are nowhere to be seen.
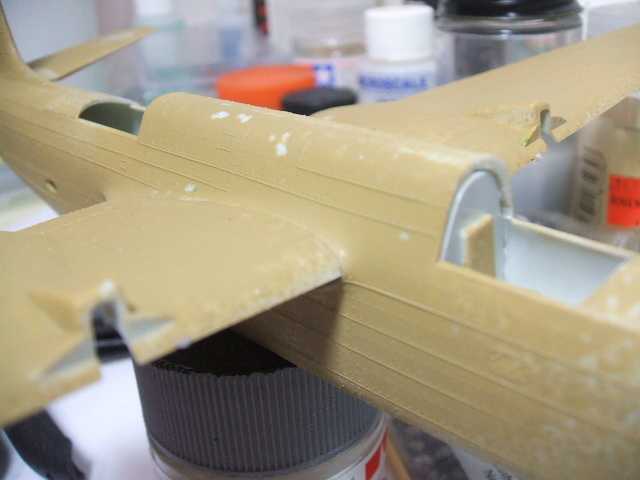
Here they are!
I took my razor saw and cut off the tabs that go into the fuselage. Took about thirty seconds. I also cut off the pins that are supposed to “help” assemble it.
They don’t help. Once you get the tops attached using super glue (the Gorilla brand super glue seems to be really good stuff) you attach the wing bottoms using liquid cement to allow for a little adjustment if it’s required. I use Micro Weld which gives me time to move things around. If I need a fast setting glue, I use super glue.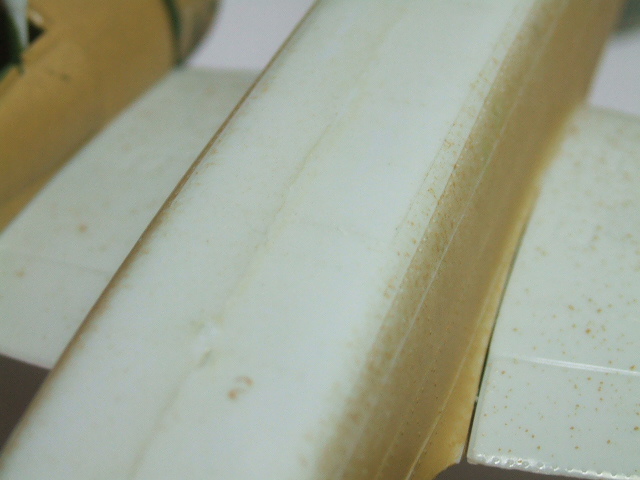
You can see the slight gap on the underside of the wing root. That’s a good sign. You can fill it with a little dab of putty, PVA glue or acrylic medium, wipe away the excess and you’re good to go. Notice the belly seam on the fuselage. If you’re careful, Revell kits from the sixties and seventies will always have this kind of fit–a.k.a. good.
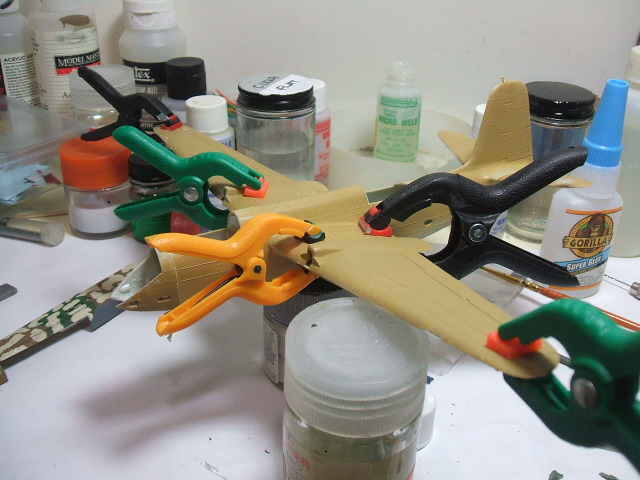
I use liquid cement in some places, such as the assembly of the cowling halves, and then super glue to attach the cowling to the wings. I attached the cowlings before the glue was set, to enable me to “bend” them to fit the wings. This is an acquired skill, but over time, learning to use the two types of cement to compliment each other will help to avoid gaps.
Once certain pats are in place, I can put on the clamps. Clamps like these are cheap and easy to get so I–wait a minute–I think I need to run down to the store and get more clamps. You can’t have too many.
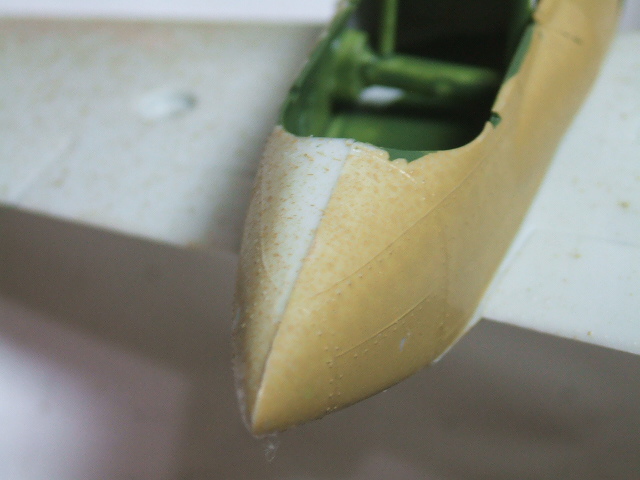
I went ahead and painted the “interiors” in Interior Green and added a tiny bit of “stuff” from the spare parts box to make the nose crew station look like something. That jerry can represents a Norden Bomb sight.
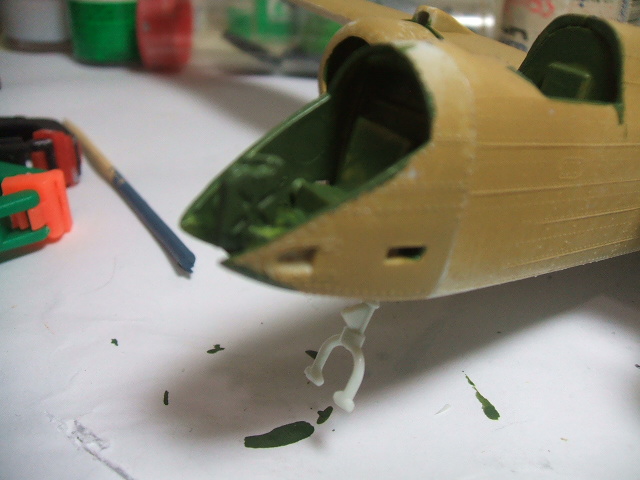
…or maybe a jerry can. It’ll look OK once it’s painted gloss black.
I had some 1/48 tires for an IL-2 in the stash (don’t ask me how they got there). I was considering replacing the fully inflated tires from the Revell kit with these nice phlat models.
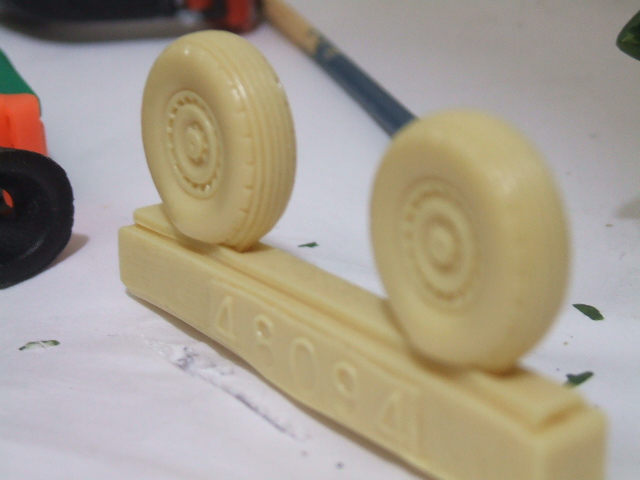
Whadaya think?
Why not? This seems to be a labour of love for you, so get those fancy wheels out and see if they fit. Interesting method with the wings. This might help for a lot of old, painful kits actually, and I have quite a few ancient Airfix kits to build.
I am guessing you guys got Matchbox kits over there? I still have a number of kits to build of theirs, both aircraft and armour, and always noticed that the pieces always fit really well when assembling.